Visual Studio Code is an open source editor by Microsoft. Lately, Salesforce has shifted it’s focus from Eclipse to Visual Studio code. The motivation behind this shift was mainly due to following reasons.
- The UI is radically different from Eclipse. It’s quite simplified with just sidebar, editor pane and panel and no more custom perspectives.
- The extension marketplace is built right into Visual Studio Code. This is not the case with Eclipse. Moreover, the amount of extensions available in VSC is far more than Eclipse.
- Project set up is way much easier. Workspaces are not required any more. Just clone your code and open folder inside the editor. If Salesforce extension is installed, you are ready to fly. All those complex wizards, dialogs are things of past now.
- Visual Studio Code is a stripped version of Visual Studio from Microsoft. This reduced its size and makes it much lighter than Eclipse.
Let’s cut the introduction short and jump into action. Today we are going set up Salesforce DX environment with Git on Visual Studio Code editor. We have divided the whole process in following major steps.
- Visual Studio Code Installation
- Salesforce connection set up.
- Working with Salesforce in VS Code
- Git set up
- Working with Git
Visual Studio Code Installation:
- Download and install the Visual Studio Code set from the URL https://code.visualstudio.com/download#. You can choose the version based on your operating system.
- Just follow the instructions and proceed with the installation.
Salesforce connection set up.
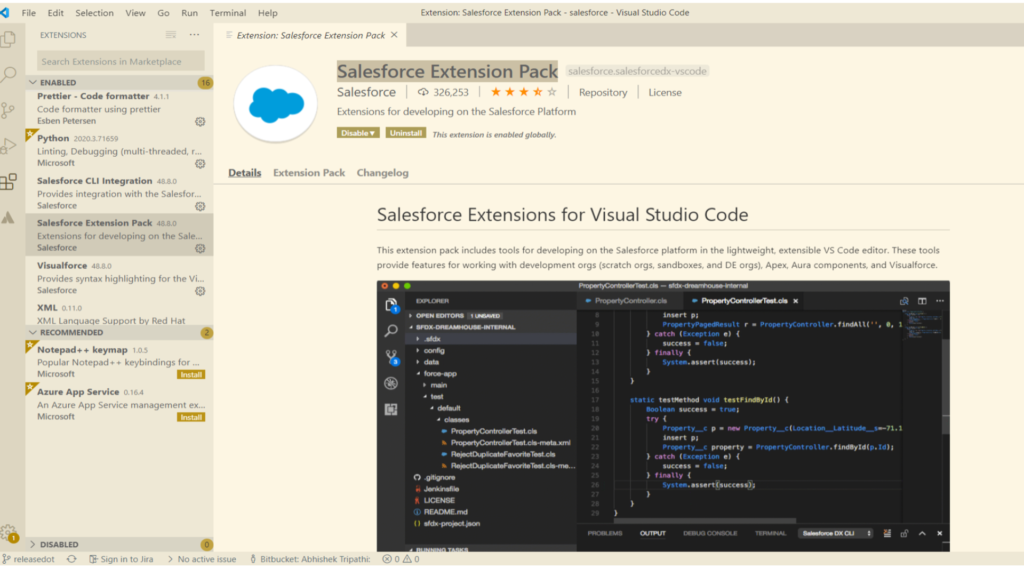
- Open Visual Studio Code and click on the extensions icon.
- Search and Install Salesforce Extension Pack plugin as shown below.
- Once the plugin is installed, we need to connect Salesforce environment with cloud. Press ctrl + shift + p on Windows, It will open up the following screen.
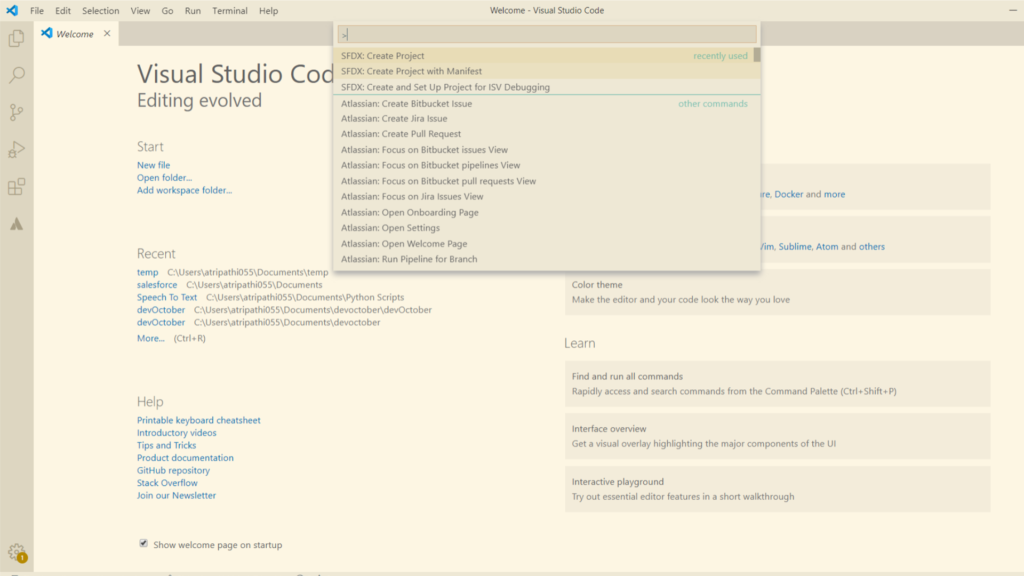
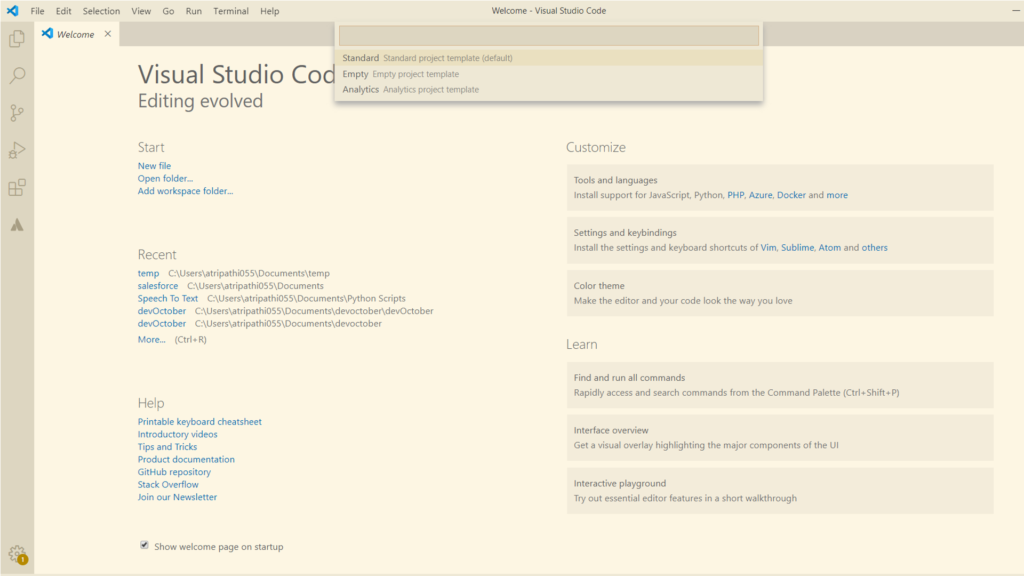
- Choose standard project template.
- Enter the project name.
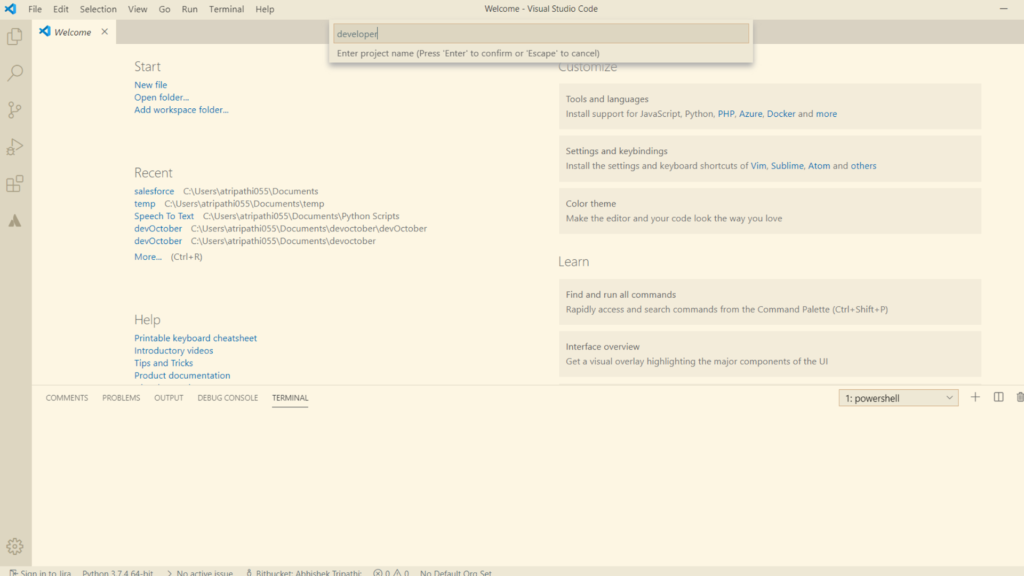
- It will ask for folder to select where the project source would reside. After this click a salesforce context environment would open up.
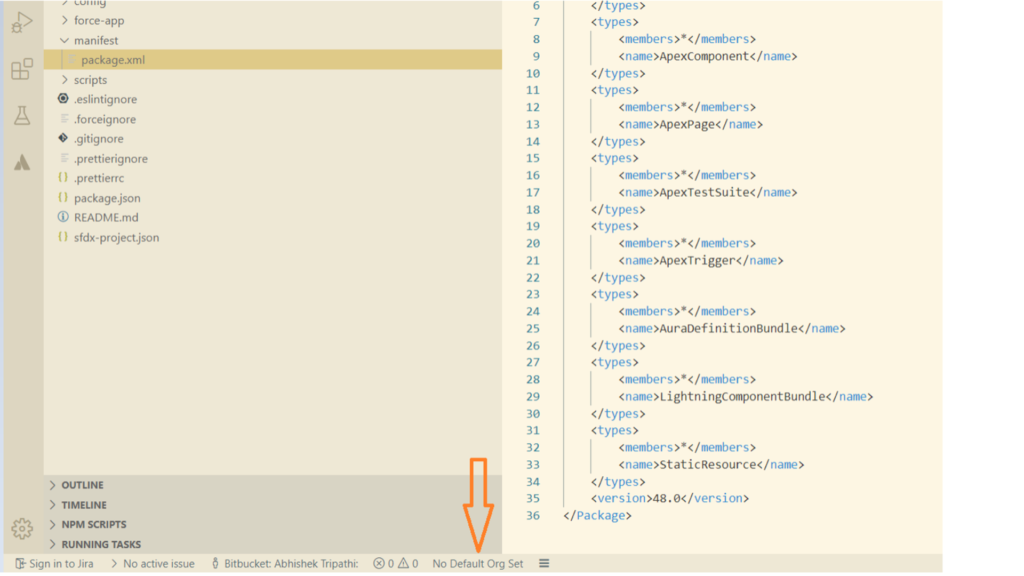
- Click on No Default Org Set as pointed in the screen below.
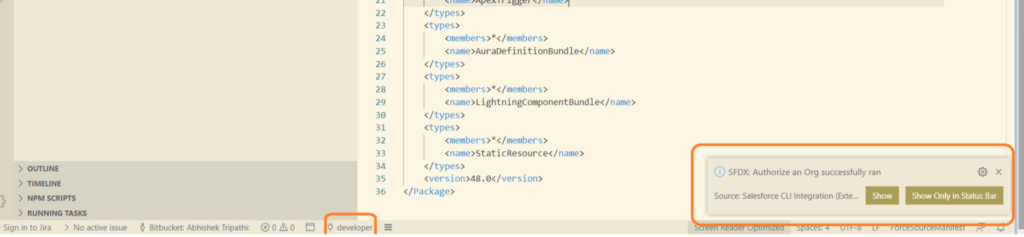
- It will open up the commands as shown below. Choose SFDX:Authorize an Org
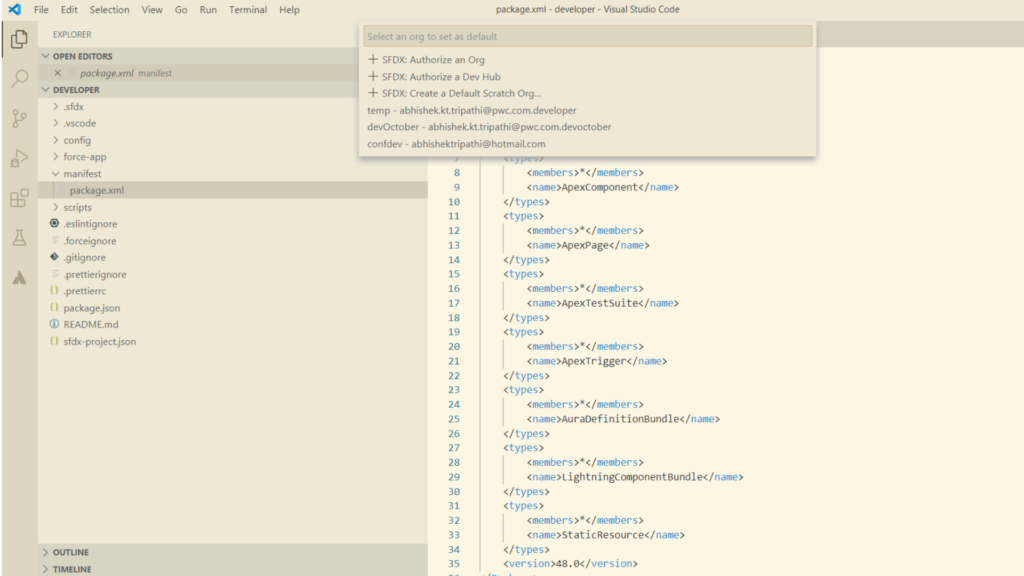
- Choose Production/Sandbox/Custom (depending on box).

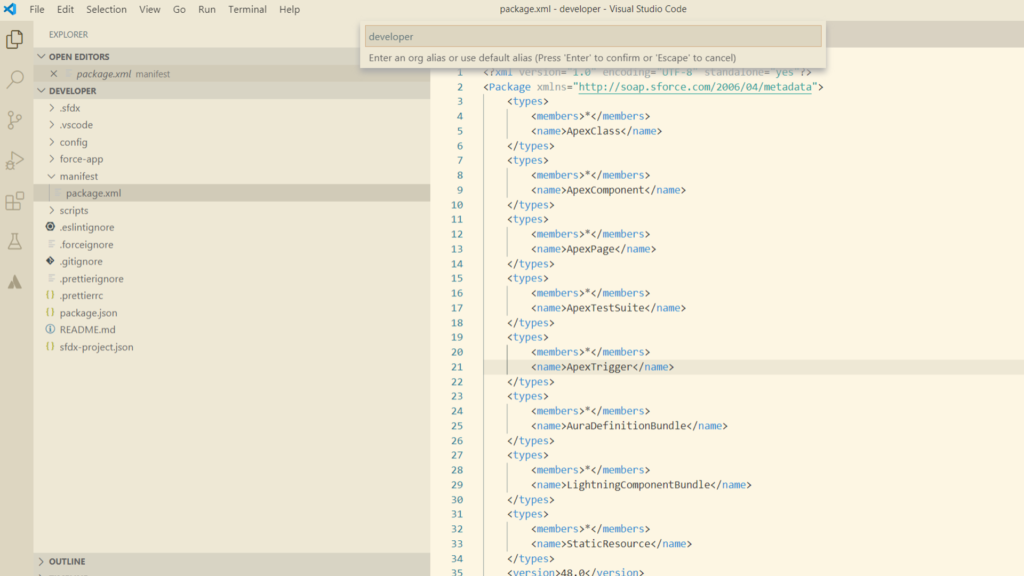
- Provide an alias for the environment. It will open up salesforce location in browser and ask for credentials.
- A success message will show as per right selection in the screen below. Also, you would default org to be plugged, notice left selection.
And that’s it. We have successfully connected the editor with cloud server.
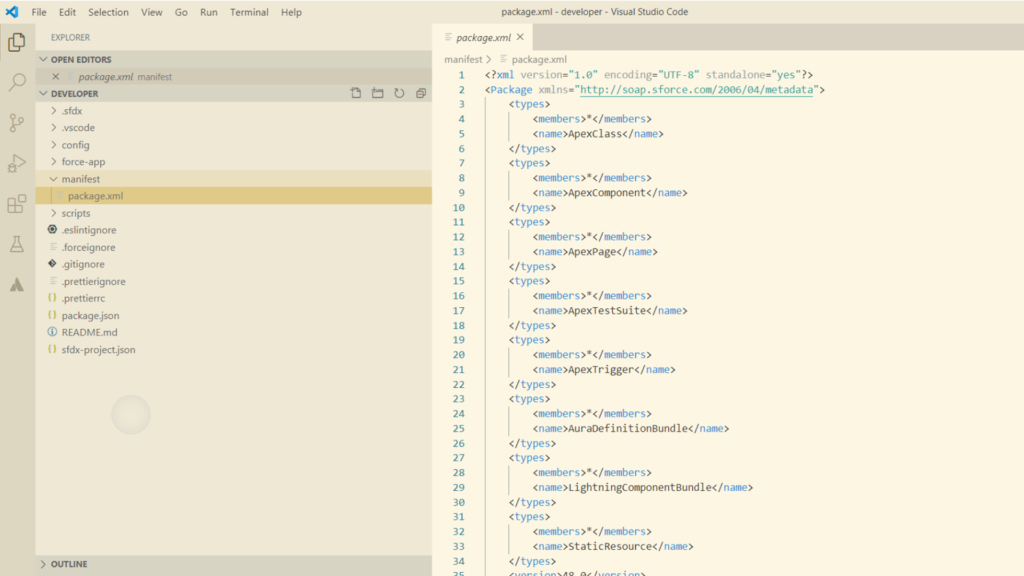
Working with Salesforce in VS Code
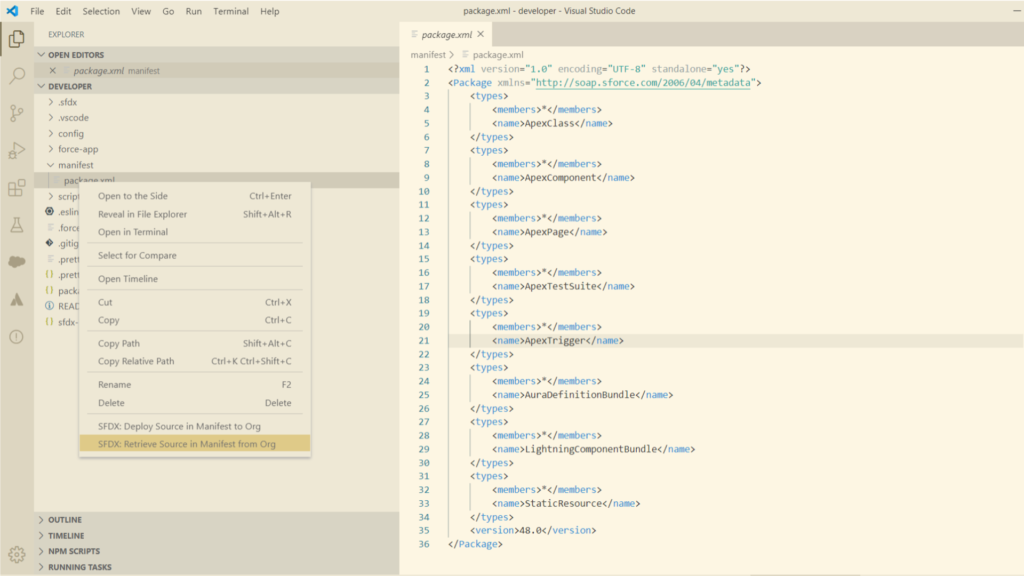
Retrieving complete source
This should be the very first step while starting the local development for the first time. To accomplish this, right click on package.xml in manifest directory. Select “SFDX: Retrieve Source in Manifest from Org”. All the source would be available under force-app directory.
Working on a single file:
- Before making any changes, go to the file inside force-app. Select and open it.
- Right click on the file and select “SFDX: Retrieve This Source from Org”. It will retrieve the latest file from source org.
- Complete your changes.
- Right click and select “SFDX: Deploy This Source to Org.”
Git(Bitbucket) set up
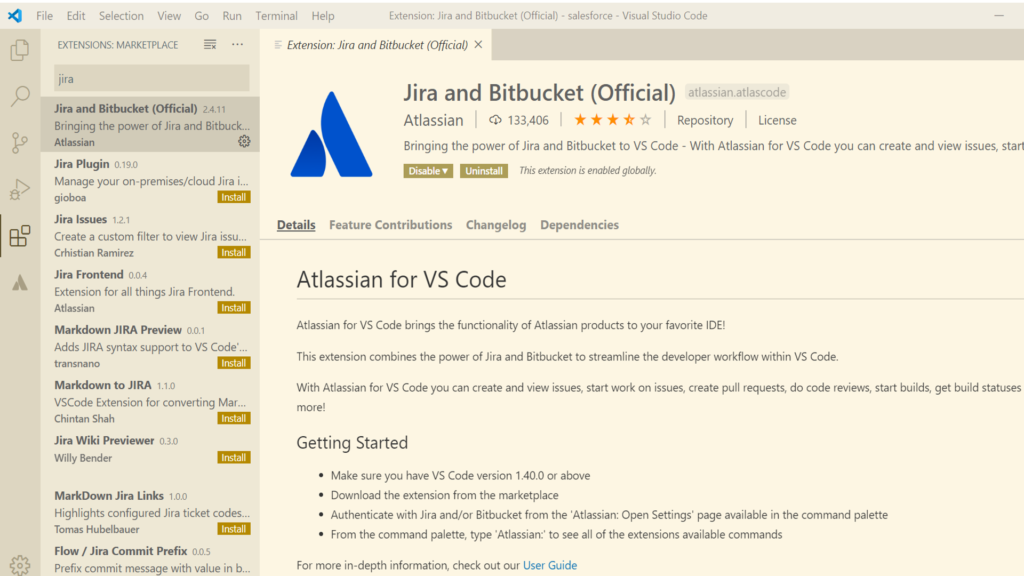
- Open Visual Studio Code and install Jira and Bitbucket (Official) Extension.
- Next steps involves Git Bash tool. If you don’t have in your local, download from here
- Create a folder in your local at the desired location. Right click on the folder and select Git Bash Here.
- Type in the following command and press Enter
- git clone https://git_url/
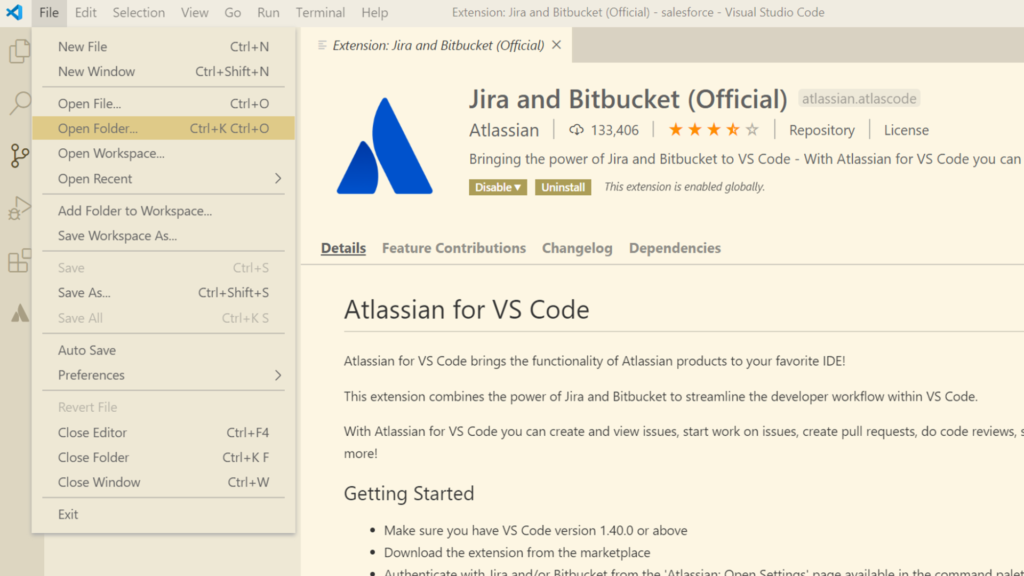
- A retrieve of the bitbucket repository will be created (locally) in the folder created. In VS code application, go to File and select Open folder option and browse for the folder created above.
- On the below bar, click on Sign in to Bitbucket.
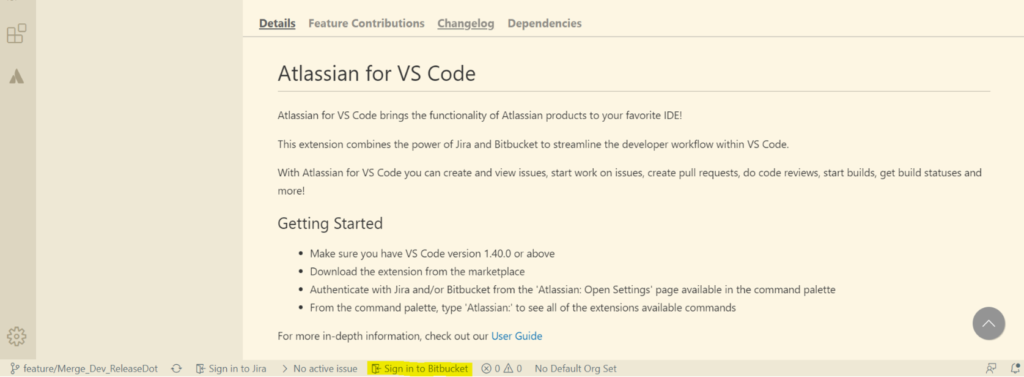
- Click on Bitbucket tab and click ‘Add Bitbucket Custom Site’. Type in the following Base URL. Enter the valid credentials.
Working with Git
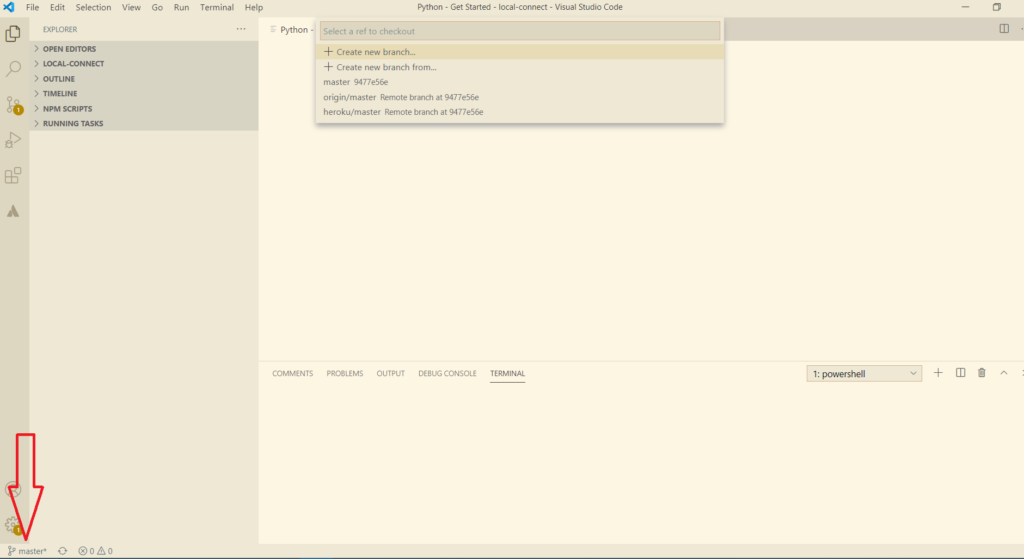
Bitbucket branch check-out: On the bar below, click on the branch name. List of all branches will appear on the top of VS Code. Select the branch that is required to be checked-out of bitbucket.
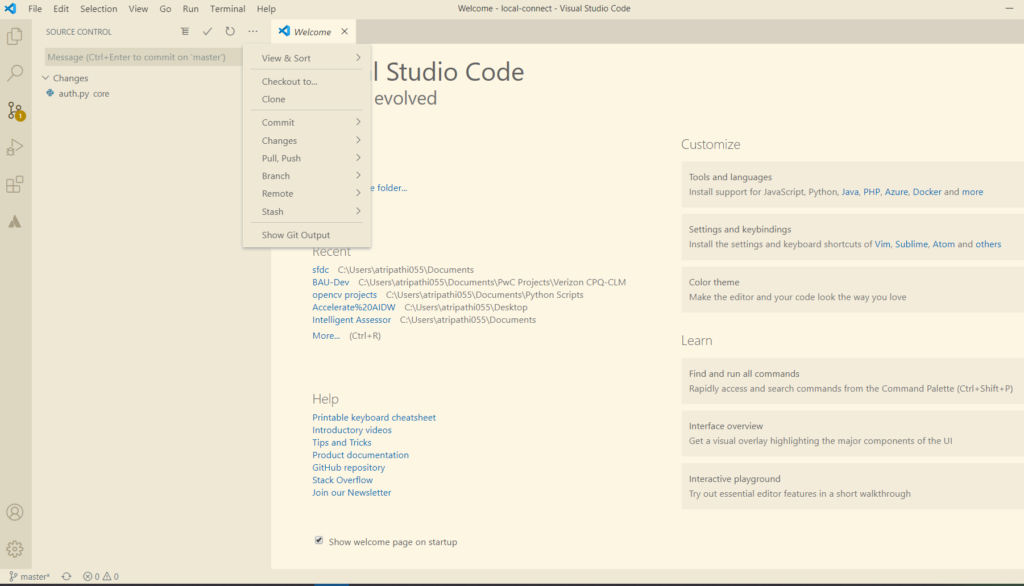
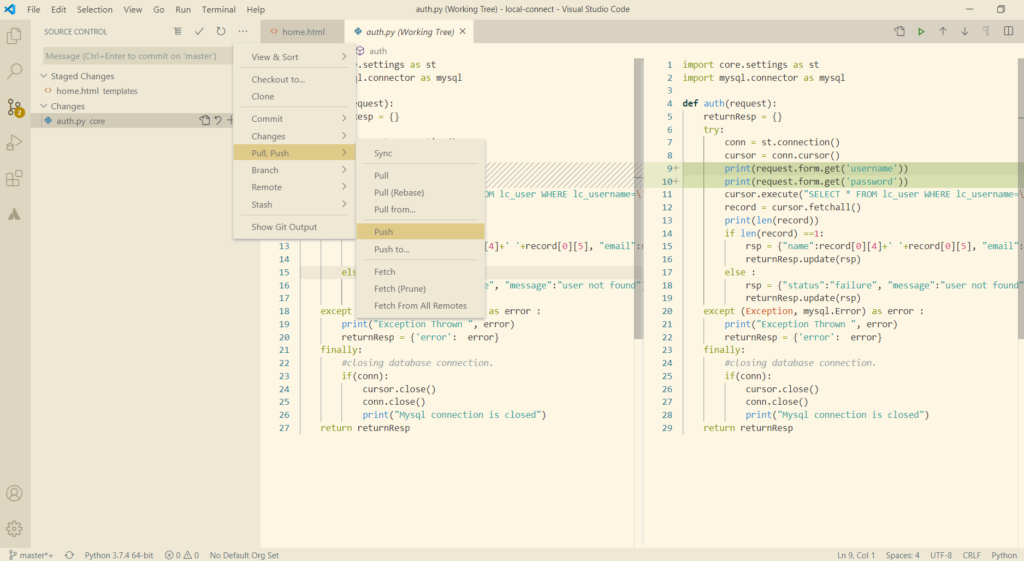
Pull: Click on Pull to take a pull of recent commits to that branch. On the bar below, click on the refresh icon for Push or Pull. Click on Source control tab on the left side. Click on “More Actions…” for more options (like Stash, checkout, sync, stage etc).
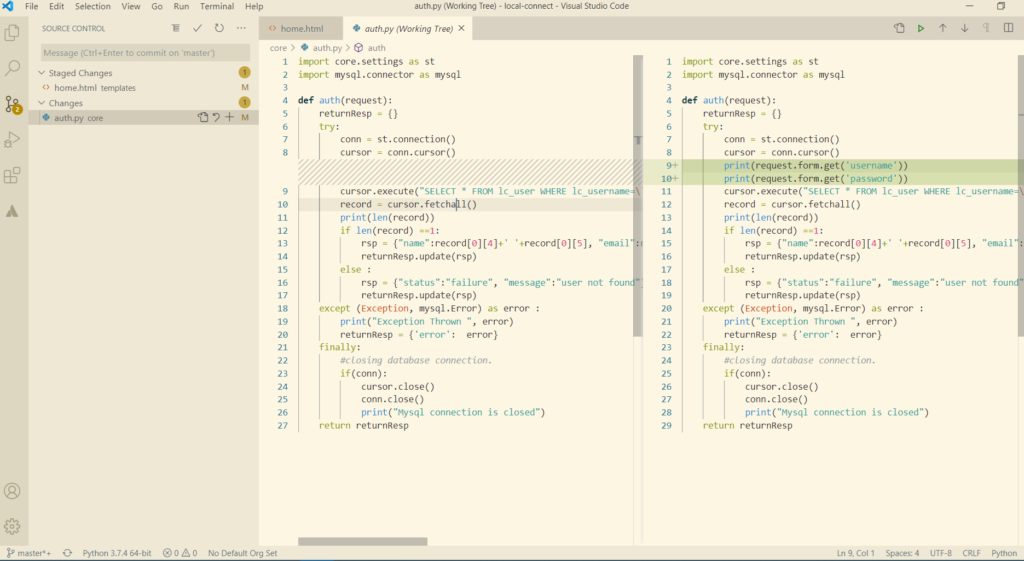
Making changes in the file: After making required changes on the feature branch local file, the changes will appear on the changes tab on the left side. Right side will show the exact changes made.
Stage and Commit: By clicking on the plus icon of the changed file (or right click and find Stage option), you will be able to stage the changes. The left pane contains the following details and intended for following actions.
- Staged and unstaged files are displayed in separate sections.
- Click on plus icon before file to stage changes
- Message can be added for a commit / check-in into the textbox.
- Click on Tick icon to commit all the staged files
Push: By clicking on the “More Actions…” button on the source control tab, we get a list of option, using push button, we will be able to push our changes to the branch.
That’s all.
One response to “Visual Studio Code – Salesforce DX with GIT”
This helps. Thanks.